
本文将要介绍整合HuggingFace的diffusers 包和ControlNet调节生成文本到图像,可以更好地控制文本到图像的生成
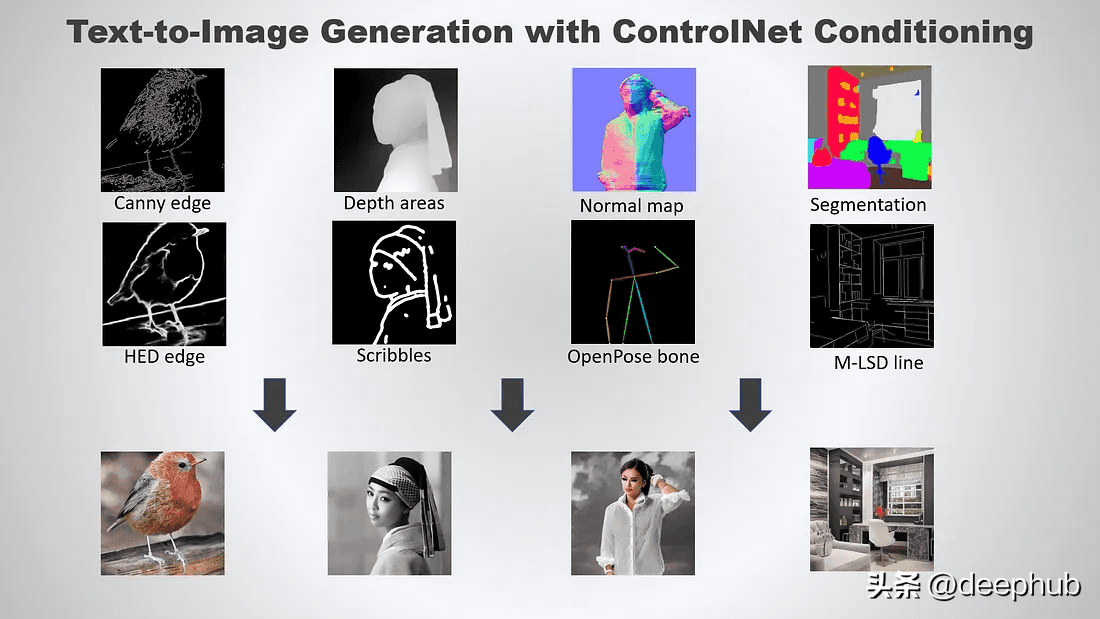
ControlNet是一种通过添加额外条件来控制扩散模型的神经网络结构。它提供了一种增强稳定扩散的方法,在文本到图像生成过程中使用条件输入,如涂鸦、边缘映射、分割映射、pose关键点等。可以让生成的图像将更接近输入图像,这比传统的图像到图像生成方法有了很大的改进。
ControlNet 模型可以在使用小数据集进行训练。然后整合任何预训练的稳定扩散模型来增强模型,来达到微调的目的。
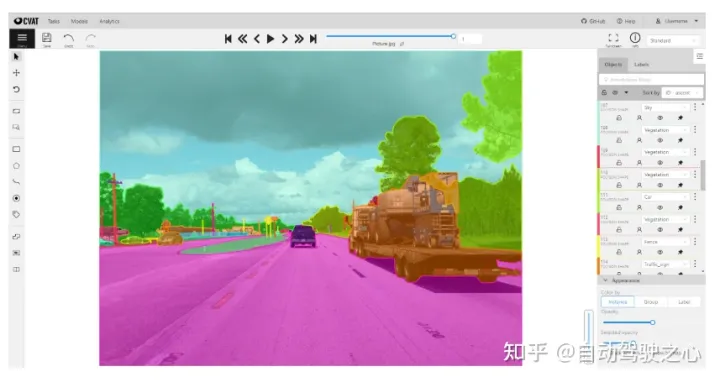
ControNet 的初始版本带有以下预训练权重:Canny edge — 黑色背景上带有白色边缘的单色图像。Depth/Shallow areas — 灰度图像,黑色代表深区域,白色代表浅区域。Normal map — 法线贴图图像。Semantic segmentation map——ADE20K 的分割图像。HED edge — 黑色背景上带有白色软边缘的单色图像。Scribbles — 黑色背景上带有白色轮廓的手绘单色涂鸦图像。OpenPose (姿势关键点)— OpenPose 骨骼图像。M-LSD — 仅由黑色背景上的白色直线组成的单色图像。下面我们开始进行整合:
设置
建议在安装包之前创建一个新的虚拟环境。
diffusers
激活虚拟环境,执行以下命令:
pip install diffusers
ControlNet要求diffusers>=0.14.0
accelerate
pip install accelerate
本教程包含一些依赖于accelerate>=0.17.0,需要使用下面命令安装最新版本:
pip install git+https://github.com/huggingface/accelerate
opencv-python
为了简单起见,我们使用canny边缘处理器,所以它需要opencv-python包。
Opencv-python有4个不同的包。官方文档推荐使用opencv-contrib-python包,但也可以使用以下任何包进行:
opencv-python主包opencv-contrib-python -完整包(附带contrib/额外模块)opencv-python-headless -没有GUI的主包opencv-contrib-python-headless -没有GUI的完整包所以我们这里使用完整包:
pip install opencv-contrib-python
controlnet-aux
OpenPose处理器需要controlnet-aux包。执行如下命令安装:
pip install controlnet-aux
xformers(可选)
xformers包可以提高了推理速度。最新版本为PyTorch 1.13.1提供了pip wheels支持。
pip install -U xformers
conda可以安装支持torch1.12.1或torch1.13.1
conda install xformers
好了,这里的环境就设置完毕了
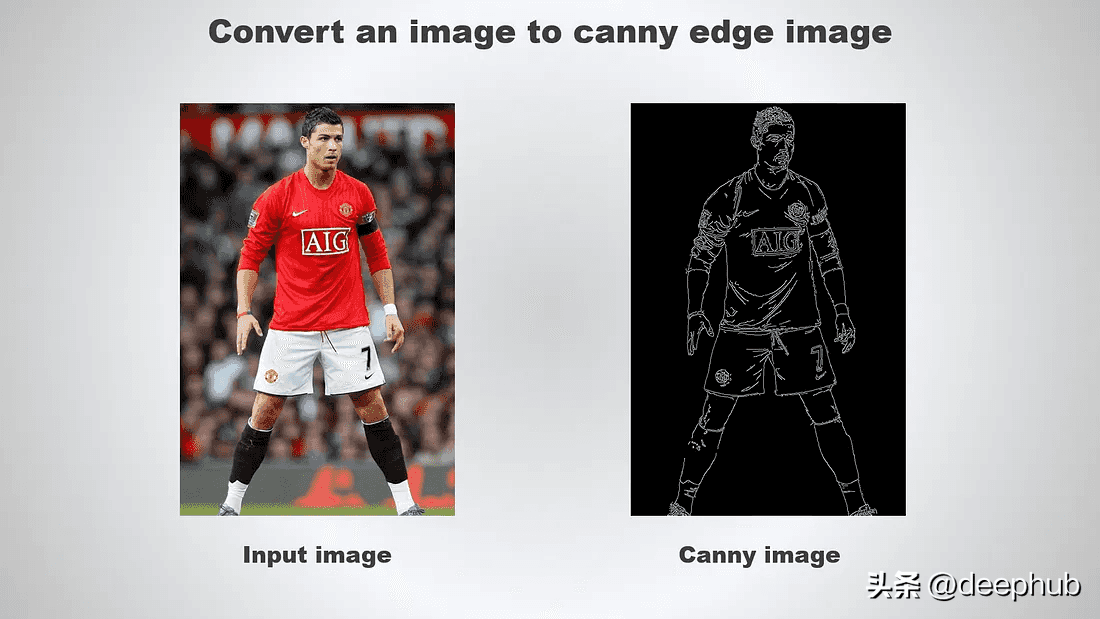
canny edge图像生成
下面就是利用canny edge ControlNet进行图像生成。它需要一个精细的边缘图像作为输入。
创建一个名为canny_inference.py的新文件,并添加以下导入语句:
import cv2 import numpy as np from PIL import Image然后,继续添加以下代码片段,从现有图像创建一个canny edge图像
import cv2 import numpy as np from PIL import Image image = Image.open(input.png) image = np.array(image) low_threshold = 100 high_threshold = 200 image = cv2.Canny(image, low_threshold, high_threshold) image = image[:, :, None] image = np.concatenate([image, image, image], axis=2) canny_image = Image.fromarray(image) canny_image.save(canny.png)保存文件后执行如下命令将图像转换为canny edge图像。
python canny_inference.py
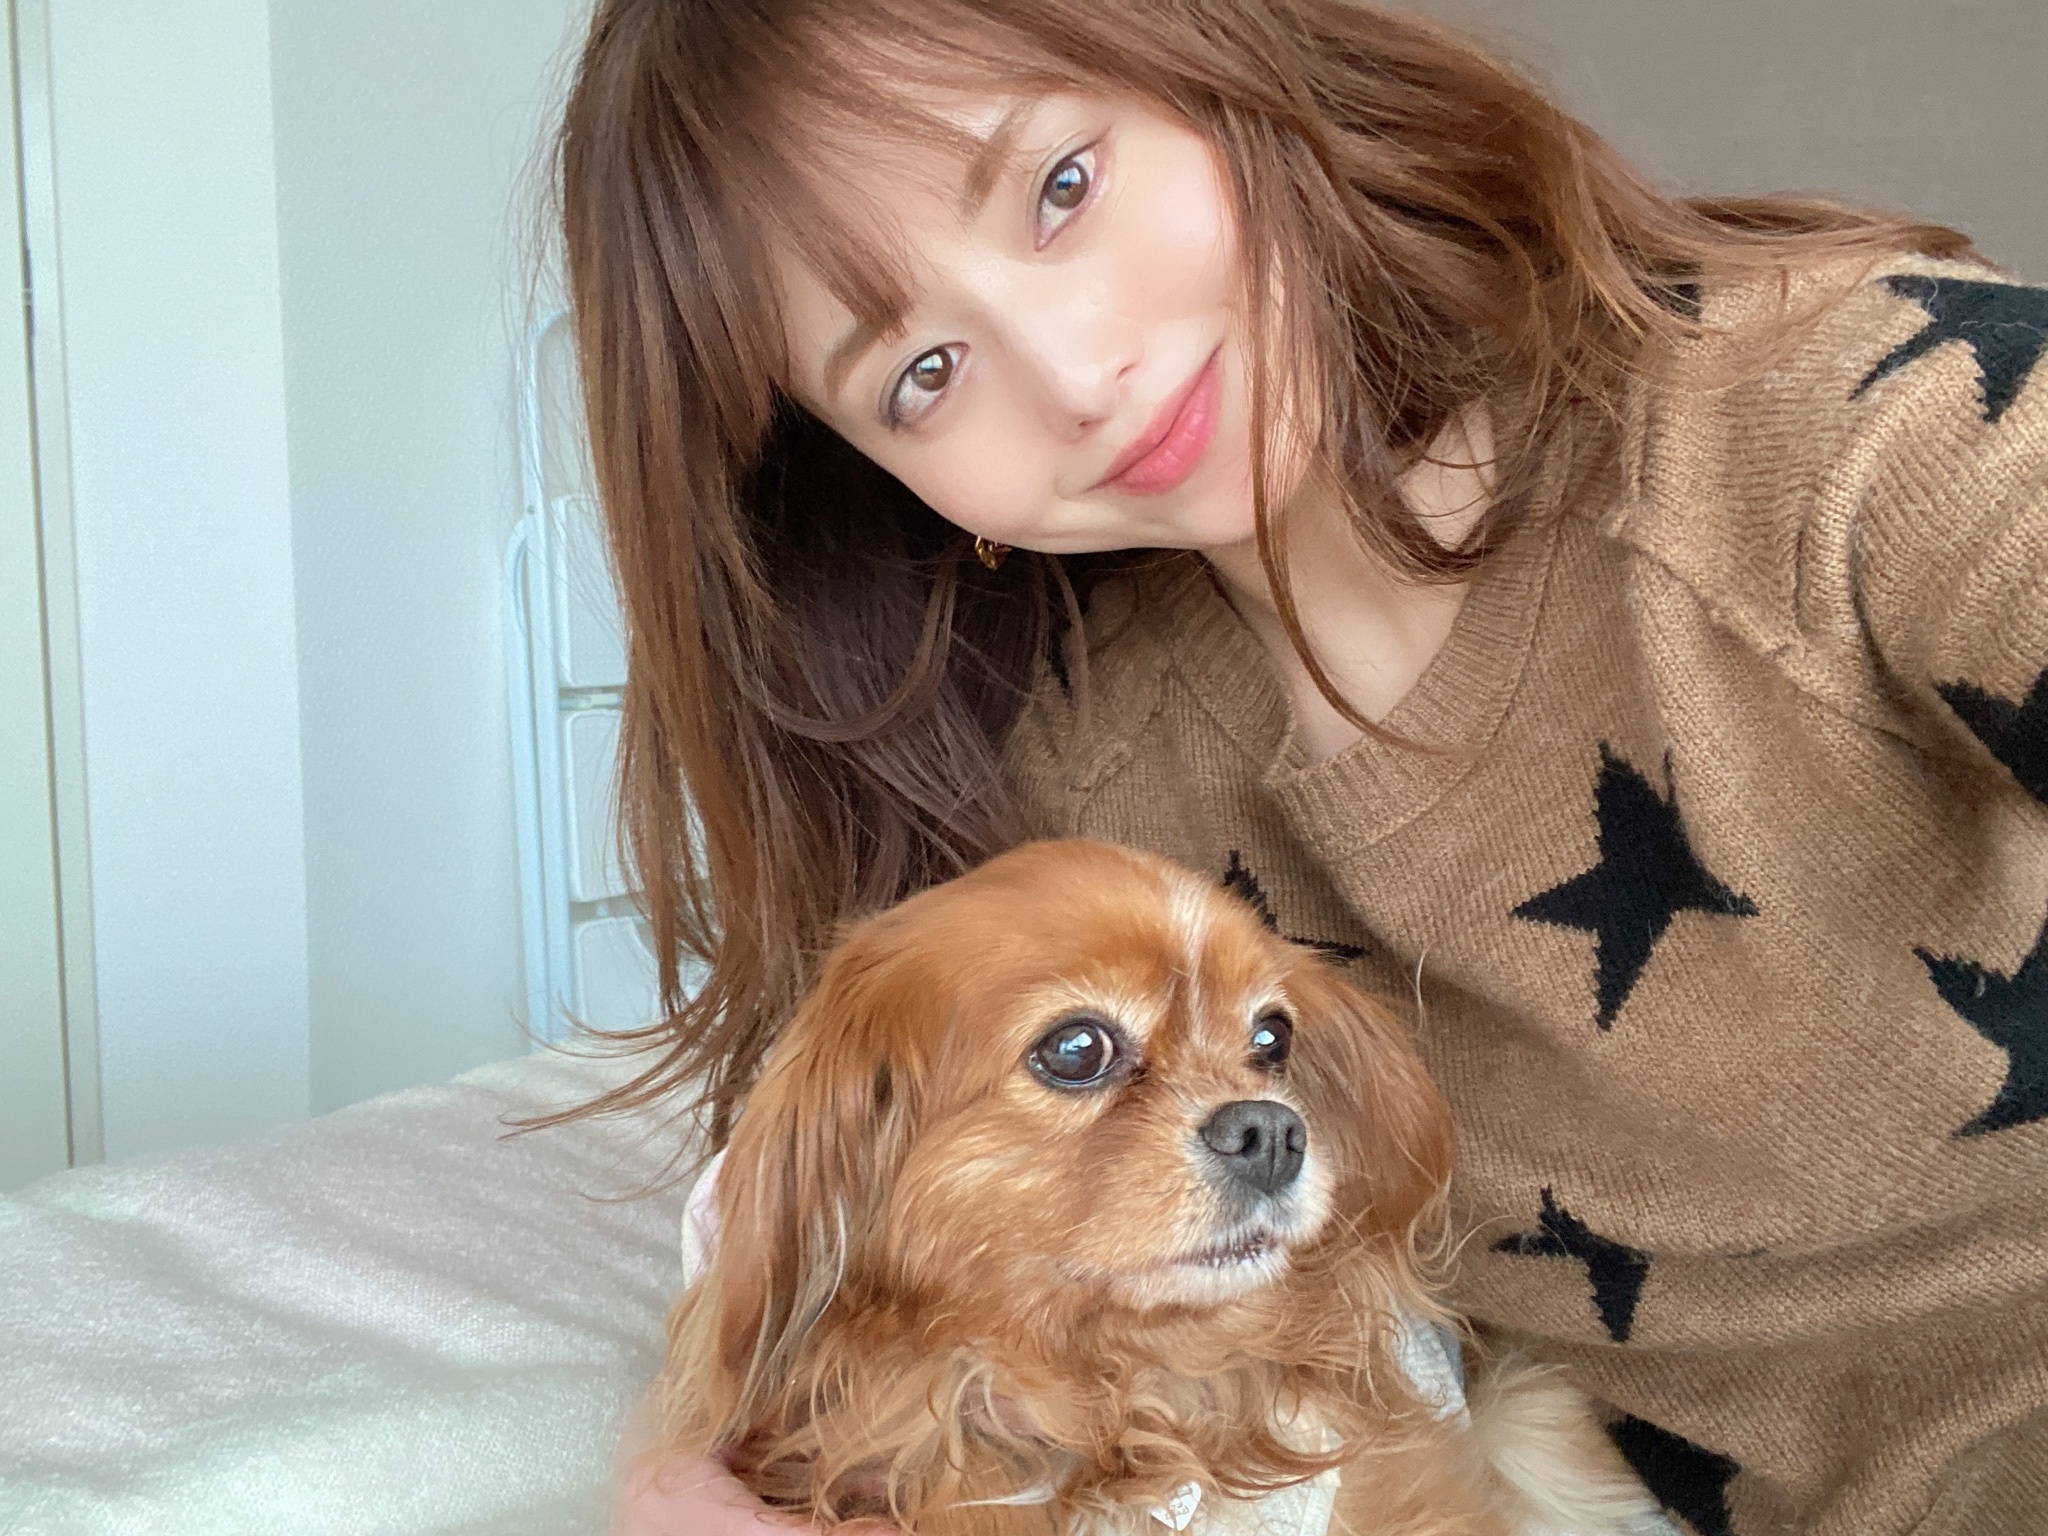
看看下面的例子:
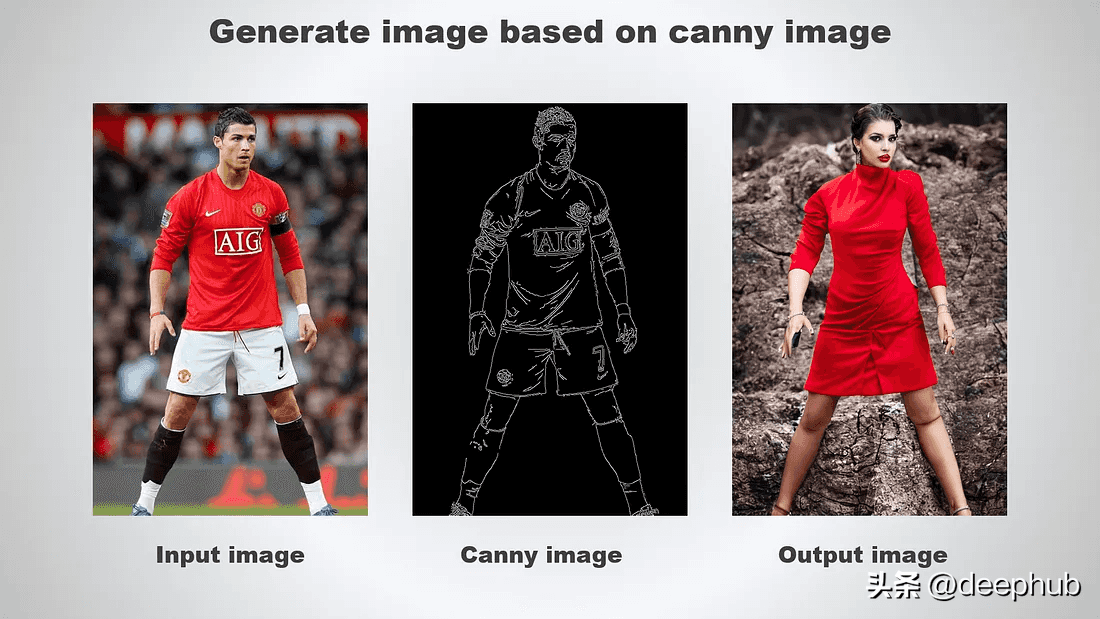
下一步是使用刚才生成的canny图像作为条件输入执行推理。
import cv2 import torch import numpy as np from PIL import Image from diffusers importStableDiffusionControlNetPipeline, ControlNetModel, DPMSolverMultistepScheduler初始化ControlNet和Stable Diffusion管道
canny_image = Image.fromarray(image) # canny_image.save(canny.png) # for deterministic generationgenerator = torch.Generator(device=cuda).manual_seed(12345) controlnet = ControlNetModel.from_pretrained(“lllyasviel/sd-controlnet-canny”, torch_dtype=torch.float16 ) pipe = StableDiffusionControlNetPipeline.from_pretrained(“runwayml/stable-diffusion-v1-5”, controlnet=controlnet, torch_dtype=torch.float16 )# change the schedulerpipe.scheduler = DPMSolverMultistepScheduler.from_config(pipe.scheduler.config)# enable xformers (optional), requires xformers installationpipe.enable_xformers_memory_efficient_attention()# cpu offload for memory saving, requires accelerate>=0.17.0 pipe.enable_model_cpu_offload()运行推理并保存生成的图像:
# cpu offload for memory saving, requires accelerate>=0.17.0 pipe.enable_model_cpu_offload() image = pipe( “a beautiful lady, celebrity, red dress, dslr, colour photo, realistic, high quality”, negative_prompt=“cropped, out of frame, worst quality, low quality, jpeg artifacts, ugly, blurry, bad anatomy, bad proportions”, num_inference_steps=20, generator=generator, image=canny_image, controlnet_conditioning_scale=0.5 ).images[0] image.save(output.png)StableDiffusionControlNetPipeline接受以下参数:
controlnet_conditioning_scale -在将controlnet的输出添加到原始unet的剩余部分之前,将它们乘以
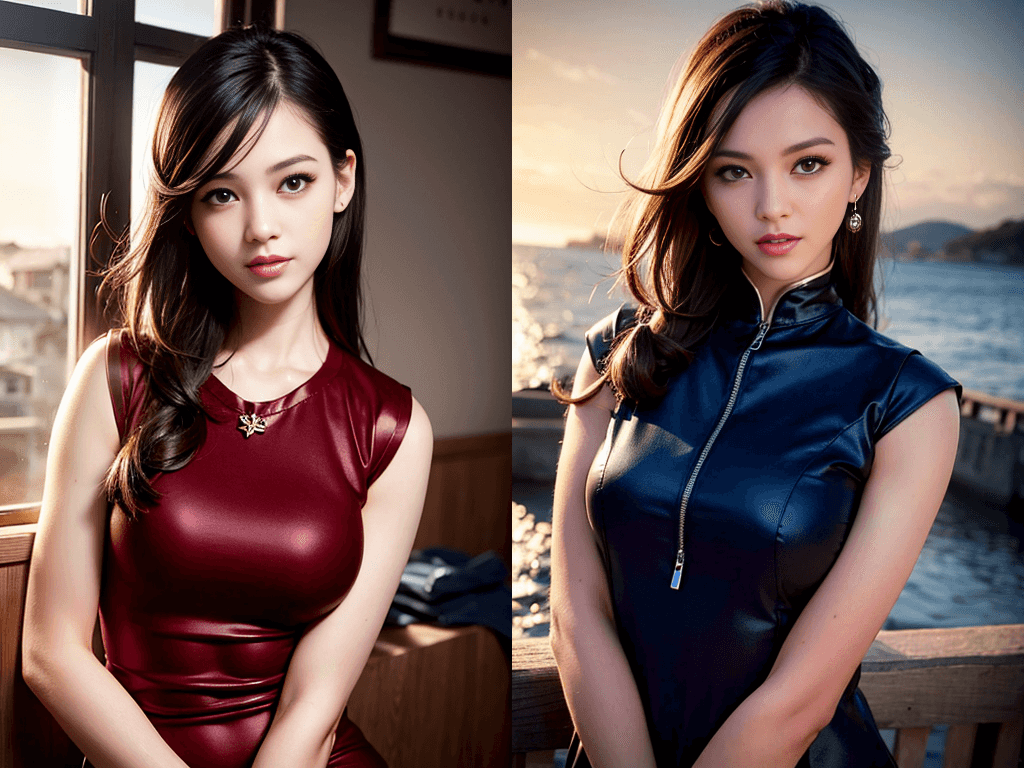
controlnet_conditioning_scale。默认为1.0,接受0.0-1.0之间的任何值。运行脚本,可以得到类似下面输出:
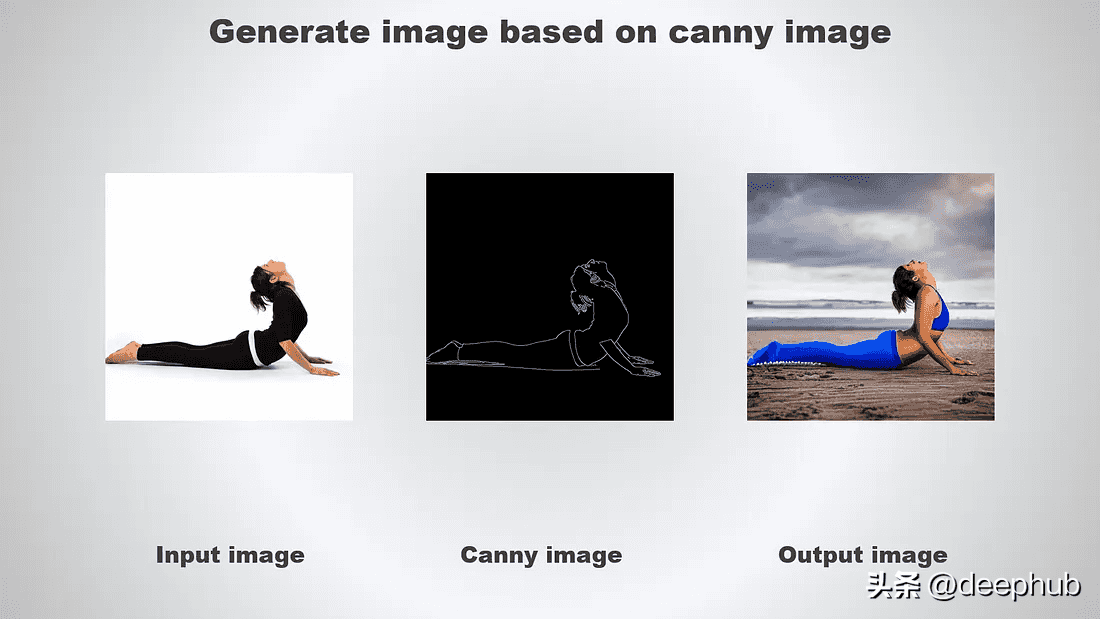
让我们用不同的输入图像和设置重新运行脚本:
image = pipe( “a beautiful lady wearing blue yoga pants working out on beach, realistic, high quality”, negative_prompt=“cropped, out of frame, worst quality, low quality, jpeg artifacts, ugly, blurry, bad anatomy, bad proportions”, num_inference_steps=20, generator=generator, image=canny_image, controlnet_conditioning_scale=1.0 ).images[0] image.save(tmp/output.png)结果如下:
OpenPose
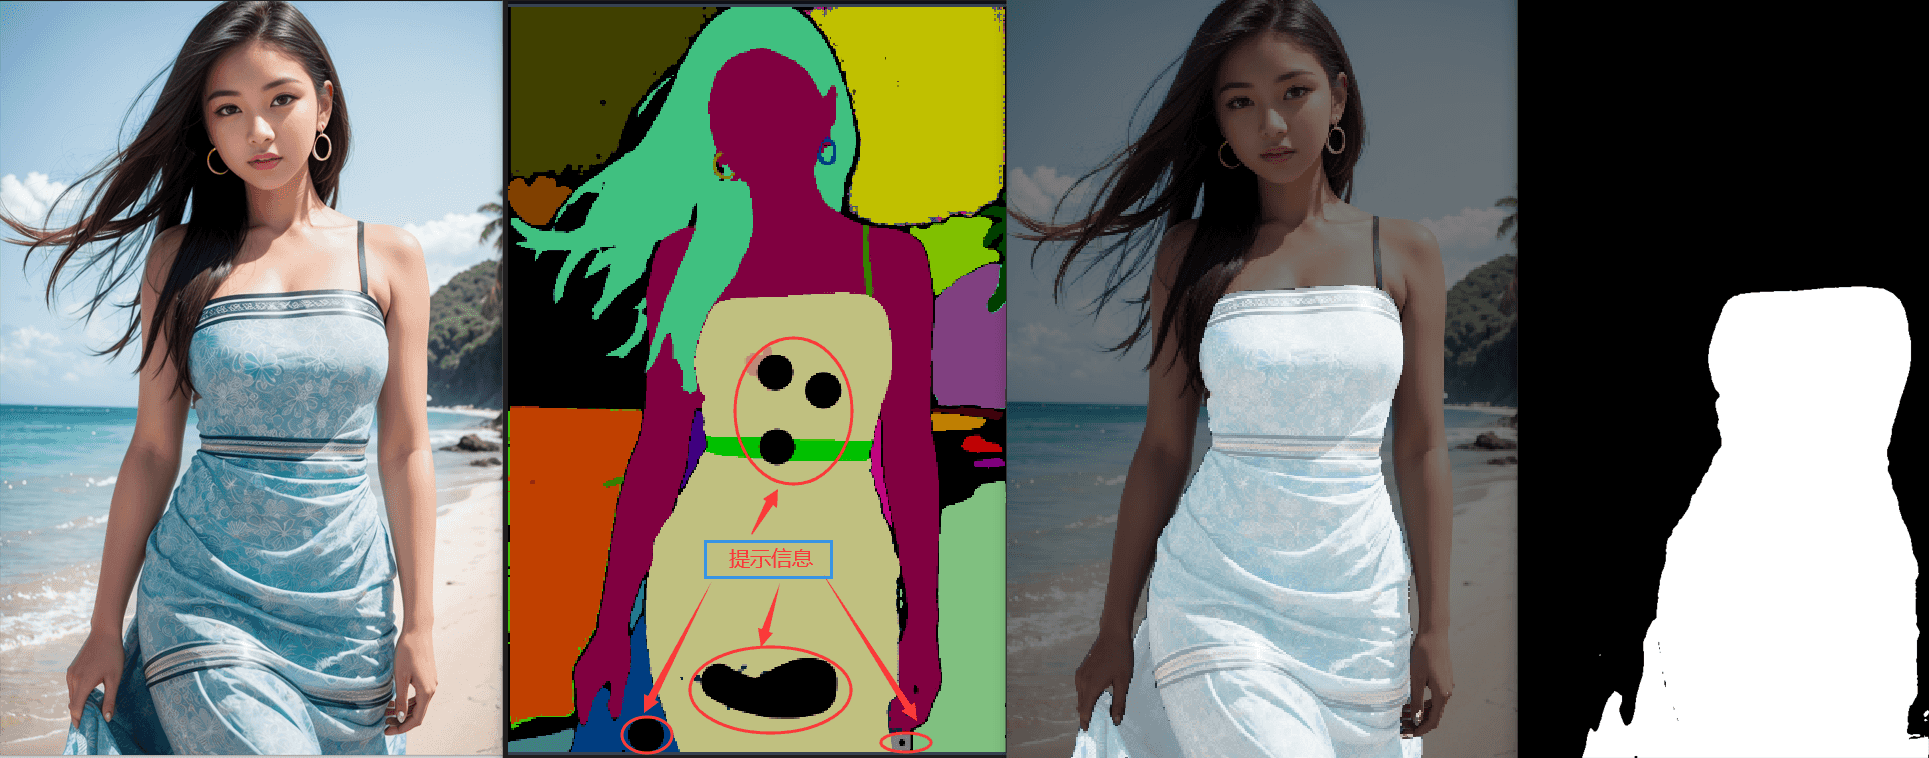
下面可以尝试使用OpenPose图像作为条件输入:
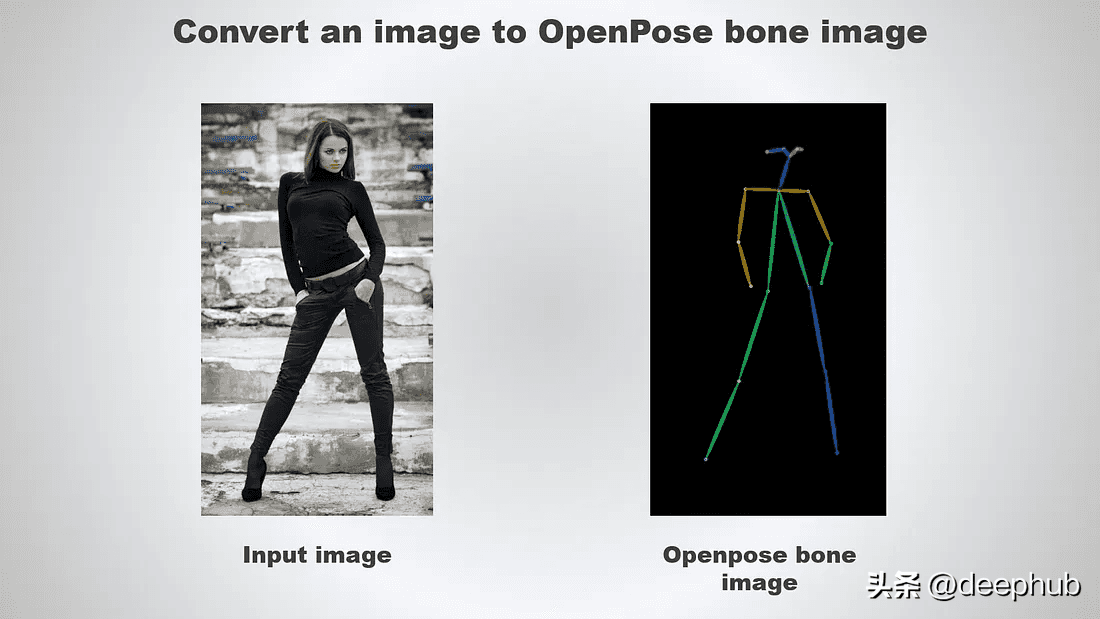
controlnet-aux 模块支持将图像转换为 OpenPose 骨骼图像。 我们创建一个名为 pose_inference.py 的新 Python 文件并添加以下导入:
import torch from PIL importImage from controlnet_auximport OpenposeDetector from diffusers importStableDiffusionControlNetPipeline, ControlNetModel, DPMSolverMultistepScheduler继续添加以下代码
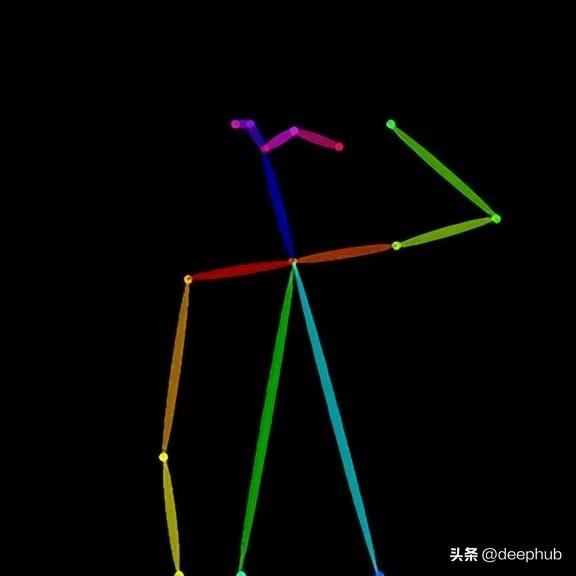
image = Image.open(input.png) openpose = OpenposeDetector.from_pretrained(lllyasviel/ControlNet) pose_image = openpose(image) pose_image.save(pose.png)执行以下图像转换为OpenPose图像:
python pose_inference.py
结果如下
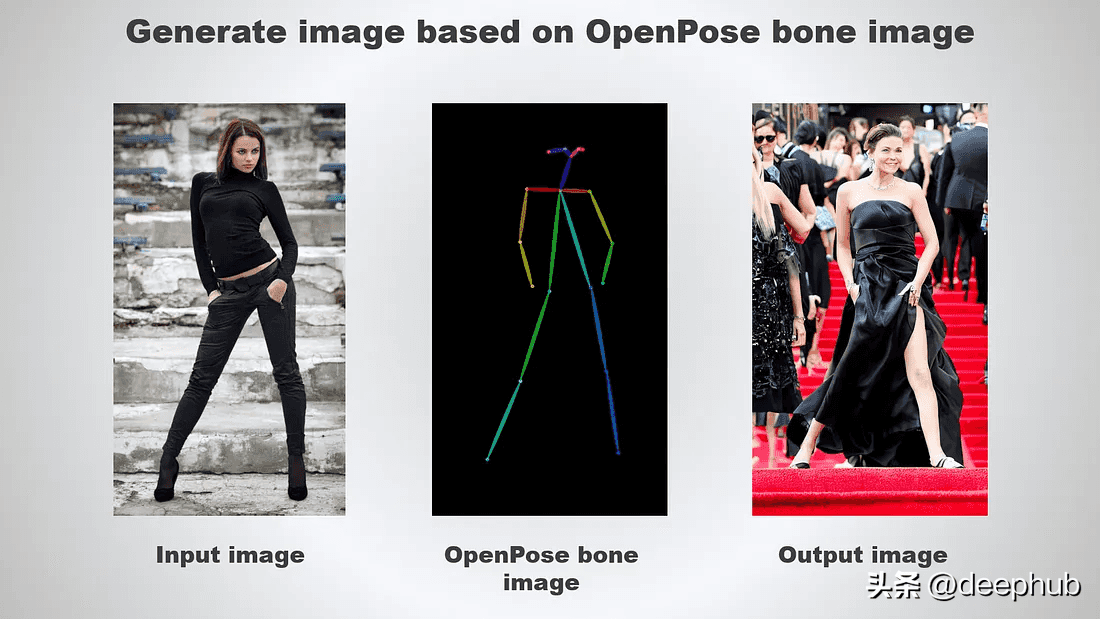
下面我们开始根据OpenPose生成图像
# for deterministic generationgenerator = torch.Generator(device=cuda).manual_seed(12345) controlnet = ControlNetModel.from_pretrained(“lllyasviel/sd-controlnet-openpose”, torch_dtype=torch.float16 ) pipe = StableDiffusionControlNetPipeline.from_pretrained(“runwayml/stable-diffusion-v1-5”, controlnet=controlnet, torch_dtype=torch.float16 )# change the schedulerpipe.scheduler = DPMSolverMultistepScheduler.from_config(pipe.scheduler.config)# enable xformers (optional), requires xformers installation pipe.enable_xformers_memory_efficient_attention() # cpu offload for memory saving, requires accelerate>=0.17.0 pipe.enable_model_cpu_offload() # cpu offload for memory saving, requires accelerate>=0.17.0 pipe.enable_model_cpu_offload() image = pipe( “a beautiful hollywood actress wearing black dress attending award winning event, red carpet stairs at background”, negative_prompt=“cropped, out of frame, worst quality, low quality, jpeg artifacts, ugly, blurry, bad anatomy, bad proportions”, num_inference_steps=20, generator=generator, image=pose_image, controlnet_conditioning_scale=1.0 ).images[0] image.save(output.png)结果如下:
总结
可以看到ControlNet是一个非常强大的神经网络结构,通过添加额外的条件来控制扩散模型。目前还不支持Multi-ControlNet,开源社区有消息说正在积极开发中。这个新功能提供了可以使用多个控制网络,并将他们的输出一起用于图像生成,允许更好地控制整个图像。
作者:Ng Wai Foong


暂无评论内容