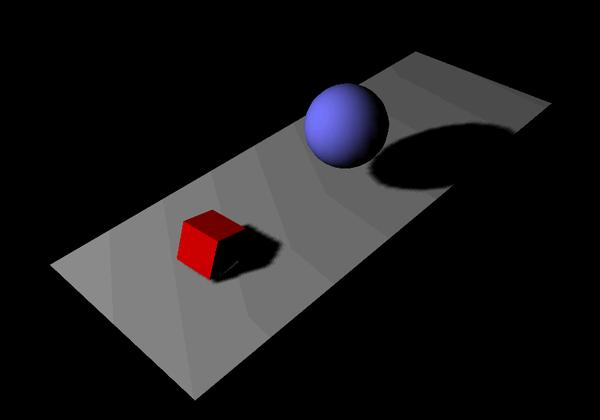
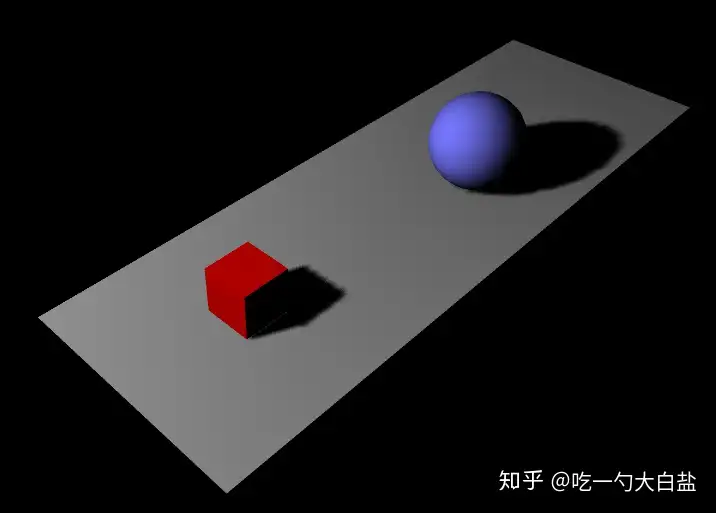
这篇文章总结一下最基础的threejs知识,至少简简单单能写出个这样的效果。
首先呢,使用threejs需要先安装,可以直接下载个threejs文件,本地静态引用。
下载地址:https://threejs.org/build/three.js
但我还是推荐的npm安装,新建个vue项目,在项目里执行:
npm install three –save
下面就是效果实现的代码介绍。
使用threejs需要创建三个东西,场景、相机和渲染器。
场景是个容器,主要用于保存、跟踪所要渲染的物体和使用的光源。相机决定了在场景中能看到什么。渲染器就是基于相机的角度来计算场景在浏览器中会渲染成什么样子。
我有个很好理解的方式,嘻嘻。
设想自己画了一幅画,并把这副画拍成了动画视频。
你要画一幅画,那一定是先需要个画板,也就是threejs中的场景。
你画呀画呀画完了,将自己的画作拍成视频,那就需要个相机。
你把相机摆放在一个位置上,对着画板开始录像,最终的视频拍完了要通过视频软件导出就能看到最终效果,这也就是渲染器做的事情。
还有一点,但凡能用钱买的,都不会只能有一个,因此threejs中定义的场景、相机和渲染器也是可以有多个的。
但目前刚入门,最基础的还是按照一个场景、一个相机、一个渲染器来操作。
创建一个场景:
const scene = new THREE.Scene();
创建一个相机:
const camera = new THREE.PerspectiveCamera(45, window.innerWidth/window.innerHeight, 0.1, 1000);
创建一个渲染器:
const renderer = new THREE.WebGLRenderer();
三个最基本的东西都已经创建完成,但初始化工作还没结束,我们可以在此基础上设置一下场景的颜色和尺寸。
设置场景颜色,这里我设置成了黑色:
renderer.setClearColor(new THREE.Color(0x000000));
设置场景的尺寸:这样,基本的初始化就可以了。
下面可以作画了。
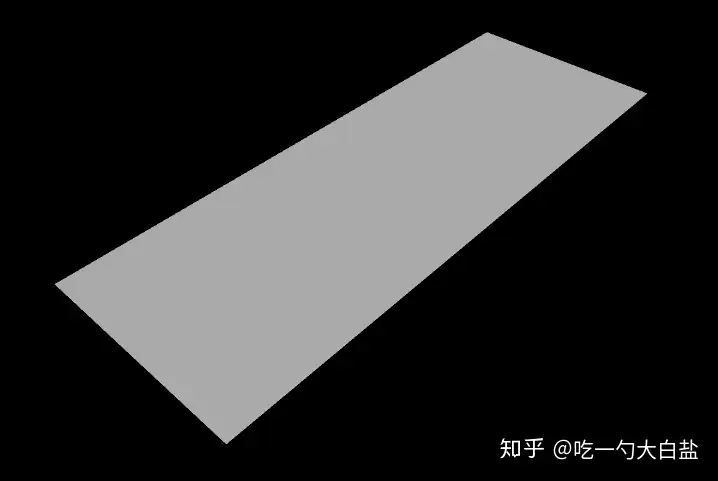
画一个面板:
const planeGeometry = new THREE.PlaneGeometry(60, 20);
const planeMaterial = new THREE.MeshBasicMaterial({color: 0xAAAAAA});
const plane = new THREE.Mesh(planeGeometry, planeMaterial);
plane.rotation.x = -0.5 * Math.PI;
plane.position.set(15, 0, 0);
scene.add(plane);
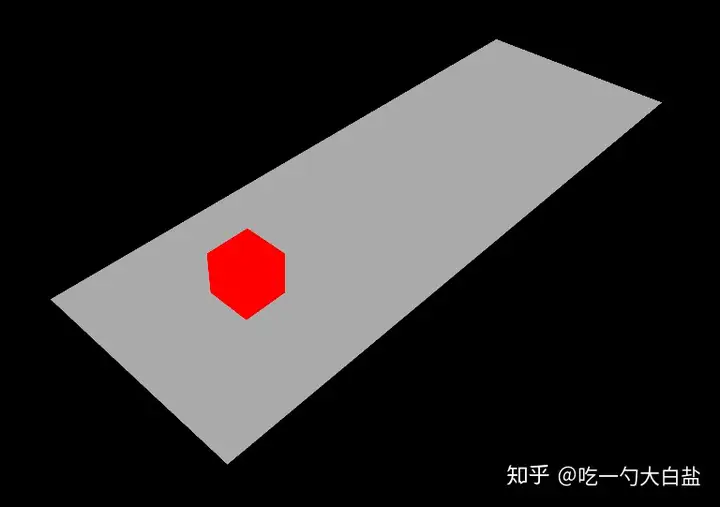
画一个方块:
const cubeGeometry = new THREE.BoxGeometry(4, 4, 4);
const cubeMaterial = new THREE.MeshBasicMaterial({color: 0xFF0000});
const cube = new THREE.Mesh(cubeGeometry, cubeMaterial);
cube.position.set(-4, 2, 0);
scene.add(cube);
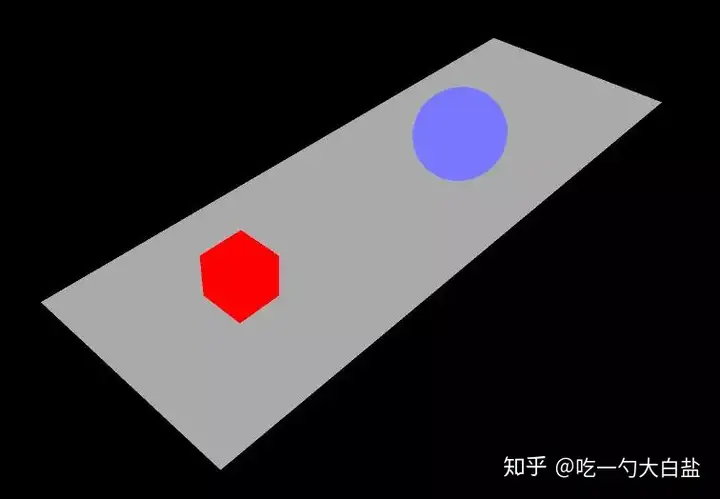
画一个球体:
const sphereGeometry = new THREE.SphereGeometry(4, 20, 20);
const sphereMaterial = new THREE.MeshBasicMaterial({color: 0x7777ff});
const sphere = new THREE.Mesh(sphereGeometry, sphereMaterial);
sphere.position.set(20, 4, 2);
scene.add(sphere);
这三个模块的代码一写,应该能看出些规律。在生成这些基础几何体的时候,都是新建了相关的一个实例,然后给这个几何体设置材质,这里是修改了材质颜色,通过Mesh方法最终生成,再设置一下显示的位置,最终一定要添加到场景中。
效果中的方块和球体是有阴影的,就像你摄像时打了一束光,那这个光源也是需要新增设置的。
const spotLight = new THREE.SpotLight(0xFFFFFF);
spotLight.position.set(-40, 40, -15);
spotLight.castShadow = true;
spotLight.shadow.mapSize = new THREE.Vector2(1024, 1024);
spotLight.shadow.camera.far = 130;
spotLight.shadow.camera.near = 40;
scene.add(spotLight);
通过设置shadow.mapSize、shadow.camera.far、shadow.camera.near这三个参数控制阴影的精细程度。但是只加了个光源其实并没有阴影效果的,还需要两个步骤。
第一是需要在初始化的时候开启阴影:
renderer.shadowMap.enabled = true;
第二是修改每个几何体的材质,上面三个物体的材质都使用的基本材质(MeshBasicMaterial),它不会对光源产生任何反应,把所有的材质都修改成 MeshLambertMaterial,Threejsz中材质 MeshPhysicalMaterial和MeshStandardMaterial,渲染时都会对光源产生反应。
并且在每个物体上开启阴影功能。
const planeMaterial = new THREE.MeshLambertMaterial({color: 0xAAAAAA});
plane.receiveShadow = true;
const cubeMaterial = new THREE.MeshLambertMaterial({color: 0xFF0000});
cube.castShadow = true;
const sphereMaterial = new THREE.MeshLambertMaterial({color: 0x7777ff});
sphere.castShadow = true;
这样就完成了静态的带阴影的效果图。
接下来是动画部分的实现,就是需要让小方块旋转,小球跳动。
这其实就是新增了个动画方法。但在此之前,需要对原有代码做些修改,因为我这里threejs安装方式是采用npm的方式。
上篇文章中的代码都是原生js,针对vue项目,有几点修改。
首先是新建一个vue项目:
vue init webpack you-project
进入项目,控制端执行指令:
npm install three –save
安装完之后在node_modules中找到three的包,
万事ok之后,就可以写一个three的组件。
1、引入threejs
在组件js的开头,引入threejs核心库。
import * as THREE from “three”;
2、methods中定义个init方法,可以将上篇文章的代码全复制进去。
3、data中定义下场景、相机和渲染器这三个变量,都是对象类型。在init中new 实例的时候,就需要赋值给这三个全局变量。类似于这样的改造:
data() {
return {
scene: {},
camera: {},
renderer: {},
}
},
mounted() {
this.init();
},
methods: {
init() {
this.scene = new THREE.Scene();
this.camera = new THREE.PerspectiveCamera(45, window.innerWidth / window.innerHeight, 0.1, 1000);
this.renderer = new THREE.WebGLRenderer();
this.renderer.setClearColor(new THREE.Color(0x000000));
this.renderer.setSize(window.innerWidth, window.innerHeight);
this.renderer.shadowMap.enabled = true;
…
}
}
4、几何体的生成封装成方法。都使用了vue,代码就可以拆分一下了,面板、方块和球体这三个物体的实现,各种封装成一个方法,在init中调用。
面板:
createPlane() {
const planeGeometry = new THREE.PlaneGeometry(60, 20);
const planeMaterial = new THREE.MeshLambertMaterial({ color: 0xAAAAAA });
const plane = new THREE.Mesh(planeGeometry, planeMaterial);
plane.rotation.x = -0.5 * Math.PI;
plane.position.set(15, 0, 0);
plane.receiveShadow = true;
this.scene.add(plane);
},
方块:
createCube() {
const cubeGeometry = new THREE.BoxGeometry(4, 4, 4);
const cubeMaterial = new THREE.MeshLambertMaterial({ color: 0xFF0000 });
this.cube = new THREE.Mesh(cubeGeometry, cubeMaterial);
this.cube.position.set(-4, 2, 0);
this.cube.castShadow = true;
this.scene.add(this.cube);
},
球体:
createSphere() {
const sphereGeometry = new THREE.SphereGeometry(4, 20, 20);
const sphereMaterial = new THREE.MeshLambertMaterial({ color: 0x7777ff });
this.sphere = new THREE.Mesh(sphereGeometry, sphereMaterial);
this.sphere.position.set(20, 4, 2);
this.sphere.castShadow = true;
this.scene.add(this.sphere);
},
当然,光源的创建也是同理可以单独写一个方法:
createLight() {
const spotLight = new THREE.SpotLight(0xFFFFFF);
spotLight.position.set(-40, 40, -15);
spotLight.castShadow = true;
spotLight.shadow.mapSize = new THREE.Vector2(1024, 1024);
spotLight.shadow.camera.far = 130;
spotLight.shadow.camera.near = 40;
this.scene.add(spotLight);
},
5、修改渲染器render。静态的写法是在最后渲染器调用它的render方法,把场景和相机作为参数传进去。
方块转动,小球跳动,这样的动画其实是改变的了方块的rotation的值,小球position值,再调用requestAnimationFrame方法不断绘制。
这里的requestAnimationFrame是浏览器自带方法,相当于告诉浏览器——你希望执行一个动画,并且要求浏览器在下次重绘之前调用指定的回调函数更新动画。该方法需要传入一个回调函数作为参数,该回调函数会在浏览器下一次重绘之前执行。
那其实也可以封装成一个方法,
rendererScene() {
this.cube.rotation.x += 0.02;
this.cube.rotation.y += 0.02;
this.cube.rotation.z += 0.02;
this.step += 0.04;
this.sphere.position.x = 20 + 10*(Math.cos(this.step));
this.sphere.position.y = 2 + 10*Math.abs(Math.sin(this.step));
requestAnimationFrame(this.rendererScene);
this.renderer.render(this.scene, this.camera);
},
别忘了,data中定义个全局的cube和sphere,在创建的时候赋值,不然这里拿不到值。
最终还是在init中的最后调用一下。这样,预期的效果就ok啦。
关注微信公众号:前端一起学,不同步更新,哈哈哈哈,欢迎添加交流一起进步哟~


暂无评论内容